One of the benefits of GA4 is that it automatically tracks common events.
Turn on this option in your account and you get tracking of file downloads, scrolls, outbound link clicks, site search, form submissions, and video engagement.
It’s easier and quicker than creating all the events from scratch. In this article, I’ll show you how to set up file tracking in GA4 and where to find the data.
I’ll also talk about the limitations of GA4’s built-in file download tracking and what to do instead.
How to set up file download tracking in GA4
Setting up file download tracking in GA4 couldn’t be much easier.
1. Click the wheel in the bottom left corner to go to the Admin section

2. Click ‘Data streams’ under the property column.
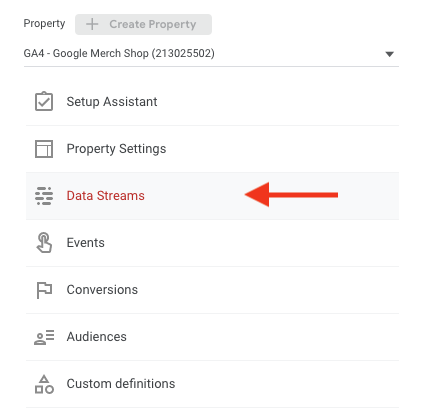
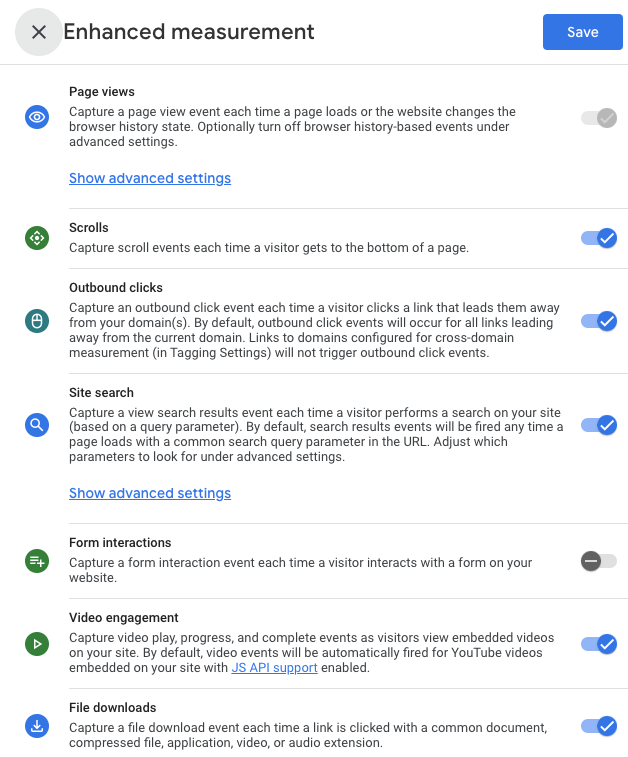
3. Click anywhere on the data stream and in the next window toggle ‘Enhanced measurement’ on.

4. Hitting the toggle will turn on event tracking for all of the events. You can choose to turn individual ones on or off by hitting the wheel icon. In this example I’ve turned off form submits because I wanted more flexibility and set up form tracking in Google Tag Manager.
The file_download event in GA4
A file_download event shows in the Events report every time a file is downloaded on your site.
These parameters are recorded along with every download:
file_extension: the type of file, .doc, .xls, etc.
file_name: the name of the file including the path, uploads/myfile.pdf
link_text: the text the user clicked to access the file.
link_url: the full URL of the file, mysite.com/uploads/myfile.pdf
One thing I find really irritating is that these parameters don’t show anywhere in the standard reports. They do show in the ‘Explore’ reports and in the API.
You can add a custom dimension to show them in the standard reports but then you’ll have two values for that parameter in the ‘Explore’ reports and in the API. So I don’t recommend doing that.
I’ll show you how to build a simple Explore report to see the parameters later in this article.
The file types the file_download will fire on are:
.pdf, .xls, .xlsx, .doc, .docx, .txt, .rtf, .csv, .exe, .key, .pps, .ppt, .pptx, .7z, .pkg, .rar, .gz, .zip, .avi, .mov, .mp4, .mpe, .mpeg, .wmv, .mid, .midi, .mp3, .wav, .wma
You can’t add to this list or edit it so if you want to change it you’ll need to disable file downloads in the Enhanced measurement settings and set up your own file download tracking manually.
How to see file downloads in your GA4 reports
As I talked about above, the reporting for file downloads is really thin out of the box.
You can only see a count of the file_download event in the standard reports. It’s in the Events report, Reports > Engagement > Events.
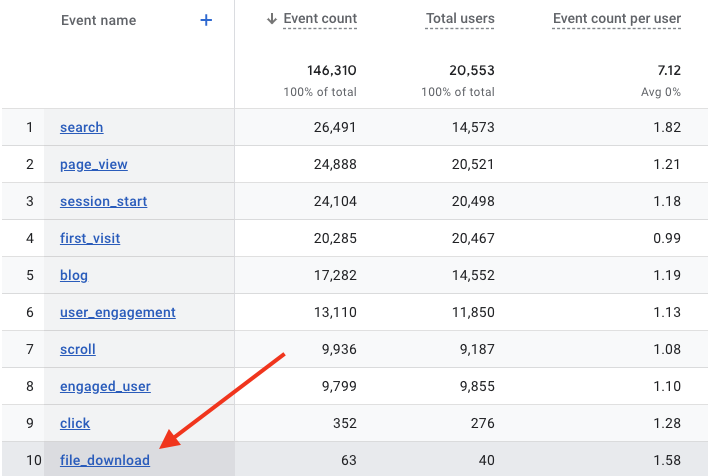
What most people will want to see is a count of downloads for the actual file names. To do that, you must create a custom report in the ‘Explore’ section.
Creating a custom report to see the actual file names
When I create a custom report in GA4 my preference is always to modify and save a standard report. Those reports look better and you can slot them into the regular reporting section.
That’s not possible for file downloads as the file download parameters aren’t available in the standard reports.
We need to create a report in the ‘Explore’ section instead. Here’s how to do it.
1. Navigate to the ‘Explore’ section in the left-hand menu and click to create a new Blank exploration.

2. Click the plus sign to add some dimensions to the report
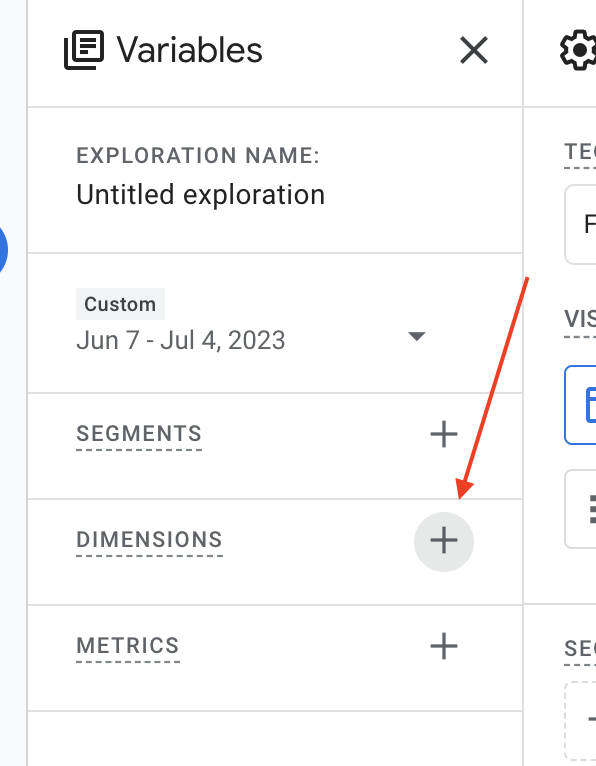
3. Search for ‘file’ and import file name and extension
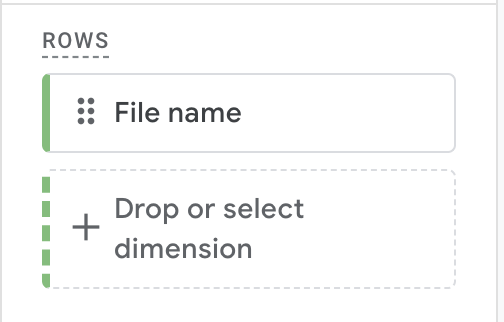
 4. Now, drag ‘File name’ over to the Rows section
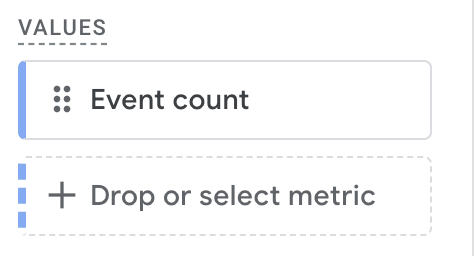
5. Next, add the ‘Event count’ metric and drag that into the ‘Values’ section.
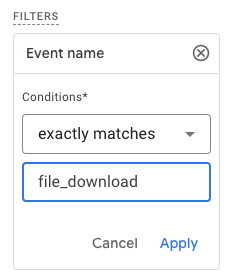
6. Lastly, add the ‘Event name’ dimension to the report and drag it over to the Filters section. Set the conditions to ‘exactly matches’ and ‘file_download’. Adding this step removes blank rows from the report.
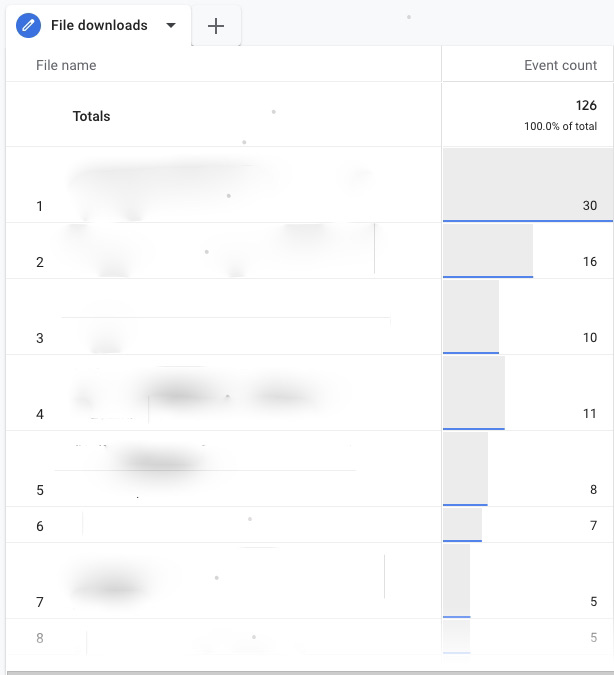
7. Your report should be ready now and look something like this (with actual filenames instead of blurry bits):
Tracking PDFs in GA4
The report we built in the last section tracked downloads of all file types.
But what if you wanted to build a report just showing PDFs? It’s pretty easy.
Follow steps 1-7 in the last section to build out your report. Then add this final step.
8. Drag the ‘File extension’ dimension across to the filters section. Then set the conditions as ‘exactly matches’ and ‘pdf’.
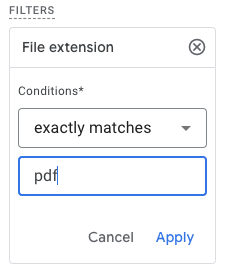
Your report will now show just the PDF downloads. You can use this same technique to build reports for other specific file types you care about.
Downsides of using enhanced measurement to track file downloads
The automatic download tracking is a real-time saver. There are two edge cases to be aware of with it though:
Edge case 1: Only certain file types are automatically tracked
Only certain file types are automatically tracked. If you want to track a file type that’s not on this list you will need to create your own tags to do it in Google Tag Manager.
Supported file types:
.pdf, .xls, .xlsx, .doc, .docx, .txt, .rtf, .csv, .exe, .key, .pps, .ppt, .pptx, .7z, .pkg, .rar, .gz, .zip, .avi, .mov, .mp4, .mpe, .mpeg, .wmv, .mid, .midi, .mp3, .wav, .wma
Edge case 2: There’s a length limit for the file’s URL
Secondly, the max limit for a file’s URL is 100 characters.
The full URL is checked against this limit. If your file URLs are very long automatic tracking will break.
The workaround is to create your own tags to do the tracking in Google Tag Manager
File tracking in GA4: sort of better
It’s a shame Google have made the standard reports so thin that you have to build out custom reports to get meaningful reporting for file downloads.
Still, it’s nice to not need to set up event tracking in Tag Manager for common events like file tracking.
Like much of GA4, it’s better in some ways but has some drawbacks too.
 All posts


